The Two-Sixties Pin - Page 6
Page 6 of 8 FirstFirst ... 45678 LastLast
Results 51 to 60 of 76

Thread: The Two-Sixties Pin

  1. #51
    Registered User
    Join Date
    Oct 2006
    Location
    Brighton, , United Kingdom.
    Posts
    169

    Default

    WE WANT BADGES...WE WANT BADGES....WE WANT BADGES...[].

    Seriously, any idea how long they might be? I want to get the front off and change the air filter, grill mesh and badge all at the same time. Might try binning the Thors hammer aswell, apparently it still runs fine, just makes a bit more noise [}].

  2. #52
    Administrator Tim's Avatar
    Join Date
    Mar 2006
    Location
    Surrey, United Kingdom.
    Posts
    9,490

    Default

    Anyone got an old rear mg badge I can send to PhilipC. I've got the front one to send.
    Tim Hayton

    Some men see things as they are and say why - I dream things that never were and say why not.

  3. #53
    Registered User
    Join Date
    Oct 2006
    Location
    Brighton, , United Kingdom.
    Posts
    169

    Default

    I have a brand new one I got off Ebay as a spare, if I can get the old one off easily I'll swap them over and you can send it to Philip.

  4. #54
    Administrator Tim's Avatar
    Join Date
    Mar 2006
    Location
    Surrey, United Kingdom.
    Posts
    9,490

    Default

    quote:Originally posted by zttal

    I have a brand new one I got off Ebay as a spare, if I can get the old one off easily I'll swap them over and you can send it to Philip.
    Good man Al.
    Tim Hayton

    Some men see things as they are and say why - I dream things that never were and say why not.

  5. #55
    Registered User
    Join Date
    May 2006
    Location
    Epsom, , United Kingdom.
    Posts
    1,124

    Default

    quote:Originally posted by zttal

    WE WANT BADGES...WE WANT BADGES....WE WANT BADGES...[].

    Seriously, any idea how long they might be? I want to get the front off and change the air filter, grill mesh and badge all at the same time. Might try binning the Thors hammer aswell, apparently it still runs fine, just makes a bit more noise [}].
    FYI, the badge is glued in from the front, so that particular job is actually easier to do with the front in place rather than removed.
    You polish yours if you want to. I'll be driving mine!

  6. #56
    Registered User
    Join Date
    Oct 2006
    Location
    Brighton, , United Kingdom.
    Posts
    169

    Default

    Thanks for that Womble, so how do you get it out without damaging the paintwork?, also is the rear one removed in the same way? Will try and get it out this weekend to send to you Tim.

  7. #57
    Registered User
    Join Date
    May 2006
    Location
    Epsom, , United Kingdom.
    Posts
    1,124

    Default

    quote:Originally posted by zttal

    Thanks for that Womble, so how do you get it out without damaging the paintwork?, also is the rear one removed in the same way? Will try and get it out this weekend to send to you Tim.
    I've seen various posts recommending self-tapping screws and all sorts. To be honest, on mine, I just carefully levered the edge up using a small screwdriver and a lot of care!

    I've not done the back one since mine (whisper this quietly) hasn't delaminated!
    You polish yours if you want to. I'll be driving mine!

  8. #58
    Registered User
    Join Date
    Oct 2006
    Location
    Brighton, , United Kingdom.
    Posts
    169

    Default

    Firstly the front badge is easy to remove with a watch makers type flat bladed screwdriver and a bit of care, shame neither of the replacements I have for it fit in the recess, so the original is back on . The rear one comes off in much the same way, but is a tighter fit and needs very careful patient hands. On removal its no wonder they delaminate, its a piece of ****. The badge is very thin like a piece if tin and is wrecked in the removal process. Heres where the fun begins, the replacement badge I have is smaller diameter-wise, by about 5mm, but is alot thicker and a proper badge like the front one. I don't know if this is for the ZT and mine (ZTT) is supposed to be different. However, if someone can check or measure, my rear badge is exactly the same dimensions as the wheel badges, and this is what it more closely resembles rather than a boot badge, which is good in one way cos these need to be made aswell and should make the whole job more viable due to increased numbers. Also the little plinth that the badge sits on had been previously broken off and glued back on, obviously this came off in my hands aswell!! It is held on with two screws from behind normally, which go through the recess under the plinth, which is shaped for the Rover shield badge, so basically the plinth is just to hide the shield recess and save making a whole new unit.
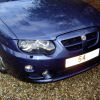
    Anyway I now have a nice shiney badge fitted to the rear which is too small and looks pretty naff, so need the replacements asap, certainly before the shows start in March. So who do I send my mangled badge to, its ok the dimensions are still measureable. This needs to be double checked with a ZT, as mentioned before, as the possible two different sized rear badges will need to be sent.

  9. #59
    Administrator Tim's Avatar
    Join Date
    Mar 2006
    Location
    Surrey, United Kingdom.
    Posts
    9,490

    Default

    E-mailed you Al

    Tim
    Tim Hayton

    Some men see things as they are and say why - I dream things that never were and say why not.

  10. #60
    "Beast of the Night" NOCTURNAL's Avatar
    Join Date
    Nov 2006
    Location
    , , United Kingdom.
    Posts
    1,466

    Default

    the 'original' sold on e-pay are listed as 40mm and 59mm arn't they?
    what size are yours ? and what size are the 'too small ones'??

    Cheers, Nick
    Nick

Posting Permissions

  • You may not post new threads
  • You may not post replies
  • You may not post attachments
  • You may not edit your posts
  •